The Fire Hydrant exercise, named for a dog’s classic leg-lift pose, is a powerhouse move targeting the glutes and hips. This in-depth guide delves into its mechanics, benefits, and variations, ensuring you master the technique for optimal muscle engagement and lower body strengthening.
What is the Fire Hydrant?
The Fire Hydrant exercise, also known as the quadruped hip abduction. Originating from a hands-and-knees stance, participants elevate one leg laterally, keeping their knee flexed. While its quirky name alludes to canines at a hydrant, the benefits are serious business. The Fire Hydrant exercise, rooted in foundational fitness techniques, stands as a beacon for individuals striving to amplify their lower body contours and achieve a fuller, more sculpted butt. From a hands-and-knees stance, this dynamic move of quadruped hip abduction requires participants to elevate one leg laterally, keeping the knee flexed. With each repetition, practitioners engage and fortify their gluteal muscles, enhancing stability and hip range of motion. It’s a favourite for individuals focused on robust lower body conditioning.
Mastering the Fire Hydrant Workout: A Comprehensive Step-by-Step Guide
Dive into the nuances of the Fire Hydrant workout with our comprehensive step-by-step guide, ensuring you harness its full benefits while maintaining impeccable form.
1. Starting Position
Begin on a mat or comfortable surface. Position yourself on all fours, aligning your hands directly under your shoulders and your knees beneath your hips.
2. Engage Your Core
Tighten your abdominal muscles gently, pulling your belly button toward your spine. This helps stabilise your spine and pelvis during the exercise.
3. Maintain Neutral Spine
Keep your back flat and neck in line with your spine; resist arching or rounding your back.
4. Lateral Leg Lift
Without shifting your weight or leaning to one side, slowly lift your right knee out to the side, keeping the knee bent at a 90-degree angle. Aim to lift your thigh until it’s almost parallel to the ground, but don’t push past your comfort level.
5. Pause and Lower
Hold the elevated position briefly, engaging your glutes at the top of the movement. Then, slowly lower your knee back to the starting position.
6. Repeat
Perform the desired number of repetitions on the right side before switching to the left leg.
The Secrete Sauce
- Mind Your Form: As you perform each repetition, ensure that your pelvis remains stable, and avoid rotating or tilting your hips. This ensures the focus remains on the targeted glute muscles and prevents potential strain.
- Correct Breathing: Inhale as you lower your leg and exhale as you lift. Proper breathing aids in muscle activation and maintains a steady rhythm.
- Focus on Quality: It’s essential to prioritise form over quantity. Avoid rushing through repetitions; a controlled and deliberate motion is more effective and reduces the risk of injury.
- Stay Hydrated: Water aids muscle function and recovery. Ensure you’re adequately hydrated before, during, and after your workout.
- Incorporate Stretching: Concluding your workout with stretches targeting the glutes and hip flexors will aid in recovery and flexibility. Consider the pigeon pose or the seated figure-four stretch.
- Consistency is Crucial: Like any exercise, the benefits of the Fire Hydrant workout are most pronounced when performed consistently. Set a regular schedule and stick to it for optimal results.

Fire Hydrant Exercise Progression
Embark on our tailored Fire Hydrant progression journey, meticulously crafted for various fitness proficiencies. This ensures a safe yet potent pathway to more robust glutes. Consult the subsequent table for insights on sets, repetitions, rest periods, and crucial tips for every stage.
| Phase | Recommended Sets | Repetitions/Set | Rest Between Sets | Important Facts |
|---|---|---|---|---|
| Beginner Phase | 2 | 10 | 30 seconds | Maintain a steady pace; focus on form over quantity. |
| Intermediate Phase | 3 | 12 | 30 seconds | Introduce a resistance band for added tension; ensure hip stability. |
| Advanced Phase | 4 | 15 | 25 seconds | Add leg extensions at the peak of each lift; maintain strong core engagement throughout. |
What’s important to say, is that every individual’s fitness journey is unique. It’s okay to remain in one phase longer than suggested. Progression isn’t solely measured by moving to advanced levels. Consistent practice, improved form, increased endurance, and a heightened sense of well-being are all markers of advancement. It’s essential to tune into your body’s signals and pace yourself accordingly.
Which Muscles Are Worked by the Fire Hydrant Workout?
The Fire Hydrant exercise is a multi-joint movement that targets several muscles, predominantly in the hip region:
- Gluteus Medius: This muscle is situated on the outer surface of the pelvis. It plays a critical role in hip abduction, and the Fire Hydrant directly challenges and strengthens it.
- Gluteus Maximus: Though the focus is on the Gluteus Medius, the Gluteus Maximus also gets engaged during the exercise, especially when lifting the leg higher.
- Hip External Rotators: These are a group of muscles, including the piriformis and gemellus superior, which help in the outward rotation of the thigh. They are activated during the Fire Hydrant, especially when the leg is lifted with the knee bent.
- Core Muscles: Similar to the Glute Bridge, the Fire Hydrant also engages the core muscles, including the rectus abdominis, obliques, and transverse abdominis. They play a role in stabilising the torso and preventing excessive movement or rotation.
- Tensor Fasciae Latae (TFL): Located on the outer hip, this muscle assists in hip abduction and is activated during the Fire Hydrant movement.
- Adductors: These inner thigh muscles, while not the primary focus, work isometrically to stabilise the pelvis and maintain body alignment during the exercise.
The Fire Hydrant workout, therefore, offers a comprehensive engagement of the hip and core muscles, making it an effective exercise for enhancing hip mobility, strength, and stability.

Exploring Fire Hydrant Exercise Variations
Diversity in workout routines is more than just a way to break the monotony; it’s a strategy to challenge the muscles differently and foster continuous growth. As you become accustomed to the foundational Fire Hydrant exercise, introducing alternatives can amplify its benefits, targeting the glutes and hip muscles from various angles. Whether you’re seeking increased resistance, a tweak in positioning, or a fresh approach, these Fire Hydrant variations will rejuvenate your workout and propel you further in your fitness journey.
Basic Variations (Without Extra Equipment)
These essential Fire Hydrant variations leverage pure bodyweight, eliminating the need for extra equipment.
Fire Hydrant Kick
Maximize Range and Power
Elevate your Fire Hydrant routine with the kick variation, adding a dynamic twist that not only intensifies the movement but also challenges the range of motion.
Targeted Muscles: This variation sharpens focus on the gluteus maximus and also brings into play the gluteus medius, ensuring a comprehensive glute workout while the core stabilises the movement.
Instructions:
- Begin in the standard Fire Hydrant position: on all fours, with hands under shoulders and knees beneath hips.
- As you raise one leg laterally (as in the regular Fire Hydrant), extend it straight out to the side, parallel to the ground.
- Engage your glutes and core throughout the motion, ensuring stability and power.
- The extended leg tests the range of motion and emphasises the activation of the outer glutes.
- Return the leg to the bent position before lowering it back down to the starting point.
- Complete the desired reps on one side before switching to the other leg.
Aim for 3 sets of 12 reps per leg or incorporate timed sets, maintaining the extended position for intervals of 20 seconds on each side.
Fire Hydrant Pulse
Heightened Activation and Endurance
Boost your Fire Hydrant routine by incorporating the pulse variation, introducing a micro-movement that intensely activates the muscles and heightens endurance.
Targeted Muscles: This adaptation zeroes in on the gluteus maximus, while also deeply engaging the gluteus medius and minimus. Additionally, the sustained pulsing motion ensures continuous tension, maximising muscle activation.
Instructions:
- Start in the conventional Fire Hydrant position: on all fours, hands directly under shoulders and knees aligned with hips.
- Lift one leg out to the side as in the standard Fire Hydrant movement, but instead of fully lowering it back down, keep it elevated.
- Begin to perform small pulsing motions upwards, keeping the movements controlled and concise.
- The goal is to maintain tension and focus on the burn in the gluteal muscles.
- Continue pulsing for a set duration or number of pulses.
- Slowly return the leg to the starting position after completing the pulses.
- Switch to the other leg and repeat.
Aim for 3 sets of 20 pulses per leg, or pulse continuously for 3 intervals of 30 seconds on each side.
Standing Fire Hydrant
Enhanced Posture and Balance
Revitalise your Fire Hydrant routine with the standing variation, introducing a shift in dynamics that emphasises posture, coordination, and balance.
Targeted Muscles: While primarily engaging the gluteus maximus, this upright adaptation also activates the gluteus medius and minimus. The added challenge of maintaining balance ensures that stabilising muscles, particularly in the core and lower back, are actively recruited.
Instructions:
- Begin by standing upright with feet hip-width apart. Maintain a straight posture with your core engaged.
- Shift your weight onto one leg, keeping the supporting knee slightly bent for stability.
- With hands on your hips or extended out in front for balance, lift the other leg out to the side, keeping the knee bent at a 90-degree angle.
- Aim to raise the leg as high as comfortably possible without compromising form or leaning excessively to the side.
- Hold at the peak of the movement for a moment, feeling the activation in your glutes.
- Slowly lower the leg back to the starting position.
- Repeat for the desired number of reps, then switch to the other leg.
Aim for 3 sets of 12 reps per leg, or alternatively, perform the movement in a more prolonged, controlled manner for 3 intervals of 20 seconds on each side.
Fire Hydrant with Resistance Band or Weights
Elevate your Fire Hydrant routine by introducing resistance via bands or weights, amplifying muscle engagement and optimising the sculpting benefits of this classic exercise.
Fire Hydrant With Band
Amplified Resistance and Activation
Elevate your Fire Hydrant routine by integrating a resistance band, adding a level of resistance that intensifies muscle engagement and magnifies strength progression.
Targeted Muscles: Utilising the band primarily accentuates the gluteus maximus, medius, and minimus. The added tension from the band not only deepens muscle activation but also engages surrounding hip and thigh muscles for a comprehensive workout.
Instructions:
- Begin by placing a resistance band around your thighs, just above the knees.
- Assume the standard Fire Hydrant position: on all fours, hands directly under shoulders and knees aligned beneath hips.
- Keeping tension on the band, lift one leg out to the side, maintaining a 90-degree bend in the knee. You should feel added resistance from the band.
- Push against the band’s resistance, aiming to lift the leg as high as possible without compromising form or rotating the hips.
- Hold the lifted position momentarily, maximising glute engagement.
- Slowly lower the leg back to the starting position, maintaining tension on the band.
- Repeat for the desired number of reps on one side before switching to the other leg.
Aim for 3 sets of 12-15 reps per leg, adjusting based on the resistance level of the band used.
Dumbbell Fire Hydrant
Boosted Load and Muscle Challenge
Intensify your Fire Hydrant exercises by incorporating a dumbbell, adding a weight element that pushes muscle engagement and fosters strength gains in a more challenging manner.
Equipment: A looped resistance band (mini band). Position the band just above your knees. A yoga mat is recommended for spinal comfort.
Targeted Muscles: The added weight primarily enhances the work of the gluteus maximus, while also challenging the gluteus medius and minimus. The presence of the dumbbell means deeper muscle engagement, promoting growth and strength in the targeted areas.
Instructions:
- Begin by selecting an appropriately weighted dumbbell. For starters, a light to moderate weight is recommended.
- Get into the conventional Fire Hydrant position: on all fours, with hands directly under shoulders and knees beneath hips.
- Place the dumbbell behind one knee, securing it by squeezing your leg around it to hold it in place.
- While keeping the dumbbell secure, lift the leg with the weight out to the side, maintaining the 90-degree bend in your knee.
- Push upwards, attempting to elevate the leg parallel to the floor, all while ensuring the dumbbell remains in position and the hips don’t excessively rotate.
- Hold the elevated position briefly, ensuring maximum glute activation.
- Gently lower the leg, returning to the starting position while keeping the dumbbell secure.
- Complete the specified reps on one side, then switch to the other leg.
Aim for 3 sets of 10-12 reps per leg, adjusting based on the weight of the dumbbell and individual strength levels.
Fire Hydrant w. Ankle Weights
Enhanced Load and Muscle Engagement
Boost your Fire Hydrant regimen by incorporating ankle weights, introducing an additional load that ramps up muscle activation and accelerates strength development.
Targeted Muscles: Implementing ankle weights predominantly emphasizes the gluteus maximus, medius, and minimus. The extra weight not only amplifies muscle engagement but also involves the surrounding hip and thigh muscles, ensuring a holistic workout experience.
Instructions:
- Begin by securely strapping ankle weights to both ankles, ensuring they are comfortable and won’t shift during the exercise.
- Get into the standard Fire Hydrant stance: position yourself on all fours with hands directly under shoulders and knees aligned beneath hips.
- With control, lift one leg out to the side, keeping a 90-degree angle at the knee. The added weight will naturally make the movement more challenging.
- Push upwards, trying to lift the leg as high as comfortably possible without compromising your form or allowing the hips to rotate.
- Pause briefly at the top, maximizing the contraction in your glutes.
- Gradually lower the leg back to its starting position, feeling the resistance from the ankle weight throughout the motion.
- Complete your desired number of repetitions on one side, then transition to the other leg.
Aim for 3 sets of 12-15 reps per leg, adjusting based on the weight of the ankle weights and your comfort level.
Benefits of the Fire Hydrant Exercise
Delve into the multifaceted advantages of the Fire Hydrant exercise, a powerhouse movement known for its ability to transform your derriere.
- Sculpted Buttocks and Hips: Regularly performing the exercise helps in toning and shaping the glutes and hip region, contributing to a more defined and aesthetically pleasing physique. It can also assist those looking to add volume to a flatter buttocks.
- Targeted Glute Activation: Directly stimulates the gluteus medius and maximus, promoting muscle growth and strength in the buttocks.
- Improved Hip Mobility: Enhances the range of motion in the hip joint, aiding in daily movements and reducing the risk of injuries.
- Strengthened Core: Engages the core muscles, leading to better torso stabilisation, improved posture, and a reduced risk of lower back issues.
- Enhanced Pelvic Stability: Strengthens the muscles surrounding the pelvis, contributing to better balance and stability during various activities.
- Better Postural Awareness: Encourages a neutral spine alignment during execution, fostering awareness and the importance of maintaining good posture in other activities.
- Increased Lateral Strength: Targets muscles responsible for sideways movements, beneficial for athletes and individuals participating in sports with multidirectional movements.
- Functional Fitness: Mimics natural movements, aiding in better performance in everyday tasks and reducing the potential for strains.
- Versatility in Workouts: Can be easily modified or intensified with weights or resistance bands, making it adaptable to various fitness levels and goals.
- Isolation of Hard-to-Reach Muscles: Specifically targets and isolates muscles that are often neglected in traditional leg workouts, ensuring a comprehensive lower body routine.
Incorporating the Fire Hydrant exercise into your fitness regimen can offer these manifold benefits, ensuring holistic lower body development and improved functional strength.
Need ideas on what to wear to the gym ?
Discover these three standout activewear and gym wear brands from Australia:


Typical Pitfalls to Avoid When Executing the Fire Hydrant Exercise
Embarking on the Fire Hydrant exercise journey offers numerous benefits, but it’s crucial to perform it correctly. Avoiding typical mistakes not only enhances its effectiveness but also reduces injury risks. Let’s explore some common missteps practitioners often make.
- Improper Alignment: Ensure that your wrists are aligned under your shoulders and your knees under your hips. Starting and maintaining the right base is essential.
- Over-Rotating the Hips: While performing the movement, keep the hips square to the ground. Avoid letting the hip of the lifting leg rotate upwards, which can diminish the effectiveness of the exercise and strain the lower back.
- Neglecting Core Engagement: It’s essential to keep the core tight and engaged throughout the movement. A lax core can result in an arching back, diverting tension away from the glutes.
- Rushing the Movement: Focus on controlled, deliberate lifts and lowers. Speeding through the exercise reduces muscle engagement and can increase the risk of injury.
- Overextending the Leg: The movement’s essence is in the abduction (lifting to the side) of the leg, not how high you can raise it. Lifting the leg too high can strain the hip joint.
- Not Using a Full Range of Motion: Ensure you return to the starting position after each rep and avoid half reps. This ensures maximum muscle activation and benefit.
- Holding Breath: Breathing is crucial. Inhale as you prepare to lift the leg and exhale as you perform the abduction.
By being mindful of these common mistakes, you can maximise the benefits of the Fire Hydrant exercise while minimising the risk of potential injuries.
Fire Hydrant FAQ
Navigating the intricacies of the Fire Hydrant exercise? Delve into our frequently asked questions to illuminate any uncertainties and optimise your workout experience.
How often should I do the Fire Hydrant?
For optimal results, incorporate the Fire Hydrant exercise into your routine 2-3 times a week, allowing rest days in between to aid muscle recovery. Adjust frequency based on your fitness goals and comfort level.
When to avoid the Fire Hydrant exercise?
Avoid the Fire Hydrant exercise if you experience sharp pain, have recent hip or knee injuries, or if advised against it by a medical professional. It’s also wise to exercise caution during advanced stages of pregnancy or if experiencing any discomfort during the movement. Always consult with a healthcare provider or fitness expert before beginning any new exercise, especially if you have underlying health concerns.
Pregnancy adaptations for Fire Hydrant?
During pregnancy, it’s essential to ensure exercises are safe and comfortable. For the Fire Hydrant:
- Limit Range of Motion: As pregnancy progresses, you might find it more comfortable to reduce the height to which you lift your leg.
- Use Padding: Ensure you have a soft surface or mat to cushion your knees and hands, providing added comfort.
- Monitor Intensity: Listen to your body. If you feel any discomfort or strain, reduce the intensity or stop the exercise.
- Maintain a Neutral Spine: To protect your lower back, avoid overarching. Engage your core gently to support your spine.
- Stay Hydrated and Breathe: Ensure you drink water and maintain steady breathing throughout the exercise.
Always consult with your obstetrician or a prenatal fitness expert before performing any exercise during pregnancy.
Is soreness typical after Fire Hydrant?
Yes, glute bridges can cause back pain if performed incorrectly or if there are pre-existing conditions that make the exercise unsuitable for the individual. Here’s how:
- Improper Form: If the glute bridge is performed with poor form, it can strain the lower back. For example, overextending or arching the back during the lift can put undue pressure on the lumbar spine. The goal is to maintain a neutral spine throughout the movement.
- Weak Core: A weak core can mean the lower back compensates for the lack of strength, leading to potential strain. It’s important to engage the core muscles when performing a glute bridge.
- Pre-existing Conditions: If someone already has underlying back issues or injuries, such as a herniated disc or spondylolisthesis, the glute bridge may exacerbate the condition.
- Overloading Weight: For weighted glute bridge variations, using too much weight before mastering the technique can lead to injury.
- Not Engaging the Glutes: The primary muscle group for this exercise is the glutes. If they are not effectively engaged, other muscles, like those in the lower back, might compensate, leading to strain.
If you experience back pain after performing glute bridges, it’s essential to assess your form, ensure you’re not using excessive weight, and consider seeking guidance from a fitness professional. If the pain persists, consulting with a healthcare professional is recommended to rule out potential injuries or conditions.
Fire Hydrant Exercise Alternatives
Explore alternative exercises that target similar muscle groups, offering diverse ways to strengthen and tone your glutes and hips beyond the Fire Hydrant.

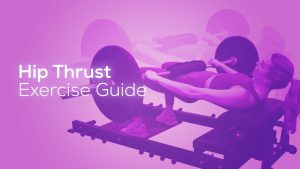
Hip Thrust Exercise
The Hip Thrust is a robust movement that emphasizes the glutes and hamstrings, providing a fusion of strength and stability gains.
➜ Learn more about the Hip Thrust Exercise

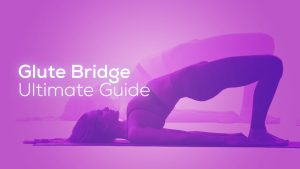
Glute Bridge Exercise
The glute bridge exercise involves lying on your back, bending your knees, and raising your hips to engage and strengthen the gluteal muscles.
➜ Learn more about the Glute Bridge Exercise

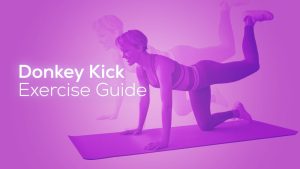
Donkey Kick Exercise
The Donkey Kick exercise involves starting on all fours and extending one leg backward at a time, focusing on activating the glute muscles in a controlled motion.
➜ Learn more about Donkey Kicks