The hip thrust is a dynamic and transformative exercise that targets the glutes, offering both strength and aesthetic benefits. Dive into this comprehensive guide as we delve into the mechanics of the movement, provide a meticulous step-by-step breakdown, discuss important considerations, highlight common mistakes to avoid, and explore a myriad of variations to keep your routine both challenging and engaging. Whether you’re a beginner or seasoned athlete, there’s something in this guide to elevate your hip thrust game.
What is the Hip Thrust Exercise?
The hip thrust is a strength training exercise specifically designed to target and develop the gluteal muscles (gluteus maximus, medius, and minimus). Originated by Bret Contreras, known colloquially as “The Glute Guy,” this exercise has gained immense popularity among fitness enthusiasts, athletes, and rehabilitation professionals due to its efficacy in building strength, power, and shape in the posterior chain.
Performed using a bench or platform for support, the hip thrust involves extending the hips in an upward motion while weight, often in the form of a barbell, is placed across the pelvis. This unique position allows for a deep stretch and contraction of the glute muscles in a way that many other exercises can’t match. In addition to the glutes, the hip thrust also activates the hamstrings, core, and lower back, providing a holistic workout for the entire lower body and core.
Its versatility doesn’t end there. With a plethora of variations available—from bodyweight hip thrusts to single-leg versions, and more—it can be tailored to suit individuals at all fitness levels. Whether you’re looking to enhance athletic performance, rehabilitate an injury, or simply sculpt a more defined posterior, the hip thrust is a formidable tool to have in your fitness arsenal.
How to Do Hip Thrusts With Proper Form?
Unlock the Power of the Pelvis: As we embark on a meticulous exploration into the grand daddy of all hip thrusts, the Barbell Hip Thrust. This comprehensive journey ensures you maximise every thrust with impeccable form, technique, and alignment through step-by-step instructions.
1. Laying the Groundworke
Find a sturdy bench and position it behind you. Sit on the ground with your upper back against the bench, feet planted firmly, hip-width apart, and a barbell placed over your hips. Ensure you have appropriate padding between you and the barbell for comfort.
2. Foot Foundations
Plant your feet firmly on the ground. They should be positioned approximately shoulder-width apart, with your toes pointing forward or slightly outwards. The positioning of your feet will play a pivotal role in the amount of force you can generate.
3. Spinal Alignment
Maintain a neutral spine and ensure your head is aligned with it. As you thrust, your line of sight should shift from forward to upward, following the natural trajectory of the movement without straining your neck.
4. Power Propel
With a controlled motion, press through your heels and engage your glutes, thrusting the hips upwards. The barbell should ascend as your hips fully extend, making sure not to hyperextend the lower back. Your body from your shoulders to your knees should create a straight line at the peak of the movement.
5. Peak Pause
At the zenith of the thrust, take a brief moment to fully engage and contract the glutes, feeling the muscles work. This intentional pause ensures maximum muscle activation.
6. Controlled Descent
Slowly and gracefully lower the barbell and your hips back to the starting position, ensuring you maintain tension in the glutes and don’t let the weight rest completely.
7. Repetition Rhythm
Continue this movement for the desired number of repetitions, always prioritising form over the quantity of weight. Remember, the barbell hip thrust is as much about precision as it is about power.
The Anatomy of an Effective Hip Thrust
- Foundation First: Positioning is pivotal. Keep your feet firmly grounded and shoulder-width apart. The stability this offers is essential for the upward force you’re about to generate.
- Harmony in Motion: As you thrust, the journey your spine takes from the base to the crown of your head should be fluid and aligned. This not only optimises muscle activation but safeguards against undue stress
- Elevate with Intention: When lifting, envision pushing the ceiling away with your hips. This mental imagery can assist in achieving a full, powerful hip extension.
- Time’s Ticking, but You’re Not: In the world of hip thrusts, speed doesn’t equate to success. Embrace each phase of the motion, ensuring your muscles genuinely feel the burn.
- Liquid Gold: Hydrate, hydrate, hydrate. Nourishing your body with water enhances muscle function and aids in post-exercise recovery. Keep that bottle within arm’s reach!
- Flex and Relax: Post-thrust stretches are your best allies. Engage in deep stretches targeting the glutes, hamstrings, and lower back. Think of poses like the Pigeon Pose or the lying glute stretch for maximum relief.
- Commit to the Climb: The majestic peaks of glute gains aren’t achieved overnight. Consistency in your Barbell Hip Thrust practice is the key to unlocking those coveted results. Stay the course, and you’ll be rewarded.

From Novice to Elite Hip Thruster
As you evolve in your fitness expedition, pushing your limits becomes essential for sustained development and mastery. The Hip Thrust, although foundational, offers avenues for progression that can amplify the challenge and magnify glute development. Here’s a progression guide to take your Hip Thrust regimen to the next echelon:
| Difficulty Level | Exercise Variation | Description | Recommended Sets | Repetitions/Set |
|---|---|---|---|---|
| 1 | Glute Bridge | Lie on your back with knees bent and feet flat. Lift hips to align with knees and shoulders. | 3 | 12-15 |
| 2 | 2 Up, 1 Down Thrusts | Perform a hip thrust with both feet, then lift one leg at the top of the movement and lower down. | 3 | 10 per leg |
| 3 | Single Leg Hip Thrusts | Perform a hip thrust while one foot remains on the ground and the other leg is extended. | 3 | 10 per leg |
| 4 | Heels Elevated Hip Thrusts | Hip thrusts performed with heels on an elevated surface, increasing range of motion. | 4 | 10-12 |
| 5 | Shoulder & Feet Elevated Hip Thrusts | Thrusts done with shoulders and feet both elevated, emphasising the glutes and hamstrings. | 4 | 8-10 |
| 6 | Banded Hip Thrusts | Perform a hip thrust with a resistance band looped around the hips, anchored behind. | 4 | 10-12 |
| 7 | Banded Hip Thrust with Abduction | While in the top position of a hip thrust, push knees out against a band looped around thighs. | 4 | 10-12 |
| 8 | Feet-Elevated Banded Hip Thrust | With feet elevated on a platform and a resistance band looped around hips, perform the hip thrust. | 3 | 12-15 |
| 9 | Hip Thrust with Chain | Perform a standard hip thrust with a heavy chain placed over the hips for added resistance. | 4 | 10-12 |
| 10 | B Stance Hip Thrusts | Hip thrusts performed with one foot flat on the ground and the other toe pointed and lightly touching the ground for stability. | 4 | 10-12 per side |
| 11 | Dumbbell Hip Thrusts | Hip thrusts performed with a dumbbell placed on the hip crease for added resistance. | 4 | 10-12 |
| 12 | Kettlebell Hip Thrusts | Perform a hip thrust with a kettlebell placed on the hip crease, driving hips upwards. | 4 | 10-12 |
| 13 | Landmine Hip Thrusts | Hip thrusts using the barbell anchored in a landmine attachment, with the other end on the hip crease. | 3 | 12-15 |
| 14 | Barbell Hip Thrusts | Standard hip thrusts performed with a loaded barbell placed across the hip crease for increased resistance. | 4 | 8-10 |
| 15 | Smith Machine Hip Thrust | Hip thrusts performed using a Smith Machine, allowing for controlled movement and resistance. | 4 | 8-10 |
Fundamental Considerations:
- Ensure your form is on point when doing hip thrusts. As you amp up the intensity, it’s easy to stray from proper alignment—don’t let that happen.
- Tune into your body’s cues. Rushing can be a ticket to injury. Nail each stage before powering up to the next.
- Symmetry is crucial. Working one side? Mirror that effort on the other to dodge imbalances.
- Always kickstart with a warm-up and think about stretching post-thrust. It’s great for recovery and keeps you limber.
- Remember, it’s not just about leveling up—it’s about owning each level to reap all the benefits from every hip thrust variation.
Muscles Worked During Hip Thrusts
The Hip Thrust is a powerful exercise that engages several muscles. When discussing the ‘hip thrust muscles worked’, it predominantly targets the gluteal and core areas in your body.
- Gluteus Maximus: The star player of the Hip Thrust, this robust muscle dominates the buttocks region. As you thrust your hips skyward, the gluteus maximus fires up intensely to fuel this movement.
- Hamstrings: Located at the rear of your thighs, these muscles partner up during the explosive upward phase of the hip thrust, helping drive the hips upward.
- Core Muscles: The hip thrust, much like many ground-based exercises, calls upon the core muscles, including the rectus abdominis, obliques, and transverse abdominis. These muscles play a critical role in ensuring stability during the movement and keeping the spine and pelvis aligned.
- Gluteus Medius and Minimus: While the gluteus maximus gets the spotlight, the hip thrust also involves these smaller gluteal siblings, particularly when ensuring hip stability and preventing unwanted lateral movements.
- Erector Spinae: These are the long muscles adjacent to the spine. They’re pivotal for maintaining a straight back. In the hip thrust, they engage isometrically to ensure the spine remains neutral and stable throughout the motion.
- Quadriceps: Although not the primary movers, the quads at the front of the thigh have a stabilising role, particularly when holding the peak position in the hip thrust, ensuring the knees remain aligned.
- Adductors: Not just for drawing the legs inwards, in the hip thrust, the adductors play a supportive role in keeping the thighs and pelvis in check, assisting in the stable and efficient movement of the hips.
Given these muscular involvements, the Hip Thrust exercise is a formidable tool for targeting the posterior chain and core. It’s instrumental in crafting a powerful, balanced posterior.

The World of Hip Thrust Variations
The hip thrust, renowned for its exceptional ability to target the glutes and bolster the posterior chain, isn’t just a one-size-fits-all exercise. As with many foundational workouts, the hip thrust comes with its own spectrum of variations, each tailored to challenge the body differently and accentuate specific muscle engagements. Whether you’re a seasoned fitness enthusiast or a beginner eager to diversify your training, diving into the diverse world of hip thrust variations can unlock new levels of strength, stability, and muscular development. Let’s delve into these alternatives and discover how to make the most of this powerhouse movement.
Beginner Hip Thrust Variations Without Gear
Using only a bench for shoulder support, these bodyweight-centered hip thrust variations are ideal for beginners, eliminating the need for extra equipment while providing a solid foundation.
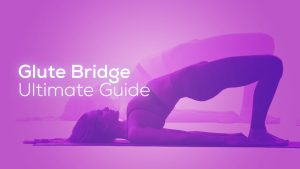
Glute Bridge
Master the Foundations with the Classic Glute Bridge
Steer your glute workout back to the basics with the quintessential glute bridge. A fundamental move for anyone keen on building their lower body strength, the glute bridge is simple, versatile, and incredibly effective.
Targeted Muscles: At its core, the glute bridge zeroes in on the gluteus maximus. Additionally, it engages the hamstrings, core stabilisers, and to a lesser degree, the lower back and adductors, providing a holistic lower body workout.
Instructions:
- Begin by lying flat on your back on a comfortable surface, arms resting at your sides, palms facing down.
- Bend your knees and position your feet flat on the ground, approximately hip-width apart and close enough that you can touch your heels with your fingertips.
- Pressing through your heels and engaging your core, elevate your hips towards the ceiling. Ensure your feet stay firmly grounded and avoid pushing with your arms.
- Lift your hips until a straight line is formed from your knees to your shoulders, squeezing the glutes hard at the top of the movement.
- Gently lower your hips back down without allowing them to completely rest on the ground, maintaining tension in the glutes.
- Repeat for the desired number of repetitions.
Aim for 3 sets of 15 reps. To intensify the movement, hold the bridge position for several seconds during each repetition or consider adding a resistance band around your thighs, promoting external rotation and further engaging the glutes.
➜ Check out our Ultimate Glute Bridge Guide
2 Up, 1 Down Thrusts
Optimise Activation with 2 Up, 1 Down Thrusts
Add a challenging spin to your glute regimen with the 2 Up, 1 Down thrusts. This technique capitalises on asymmetric loading, compelling your muscles to adapt and grow while enhancing balance and body awareness.
Targeted Muscles: Predominantly, the gluteus maximus of the working leg is under the spotlight. However, hamstrings, core, and stabilizers on both sides also play their part, ensuring a thorough lower body challenge.
Instructions:
- Begin seated on the ground with your upper back resting against a secure bench, sofa, or ledge. Plant both feet flat on the floor, hip-width apart.
- Engaging your core, push through both heels and lift your hips, coming into a standard hip thrust position.
- At the top, stabilise yourself and carefully extend one leg straight out, keeping it parallel to the other knee.
- With control, lower your hips down using only the strength of the planted foot.
- Push back up into the thrust with both feet and then switch to lower on the other foot.
- This completes one repetition – lifting with both feet and lowering with alternate ones.
Shoot for 3 sets of 10 reps (5 on each side). For an enhanced burn, pause momentarily at the bottom of the one-legged descent. This ensures maximum tension and activation before driving back up into the thrust.
Single Leg Hip Thrusts
Maximise Glute Engagement with Single Leg Hip Thrusts
Experience a new dimension to your glute training with the single leg hip thrust. This exercise not only targets your buttocks more intensely but also challenges your core and hip stability, offering a compounded benefit.
Targeted Muscles: The single leg hip thrust predominantly targets the gluteus maximus. It also activates the hamstrings and core muscles, while the foot planted on the ground gets the benefit of stabilising work, thereby engaging the quad and calf muscles.
Instructions:
- Begin by sitting on the ground with your upper back against a stable bench, sofa, or ledge. Place your feet flat on the floor, hip-width apart.
- Extend one leg straight out, keeping it parallel to the floor.
- Plant the other foot firmly, positioned close to your glutes.
- Pushing through the heel of the planted foot, raise your hips upwards, squeezing the glutes at the top. Ensure your extended leg remains straight and raised.
- Your body should form a straight line from your shoulders to the knee of the planted leg at the peak of the movement.
- Slowly lower your hips back to the ground without fully resting. This maintains tension in the targeted muscles.
- After completing the desired reps on one leg, switch to the other.
Aim for 3 sets of 10 reps per leg. For a more intense challenge, hold the top position for intervals of 5-10 seconds during each rep, emphasising the glute squeeze.
Heels Elevated Hip Thrusts
Heightened Activation and Depth with Heels Elevated Hip Thrusts
Take your hip thrust sessions to the next level by elevating your heels. This subtle modification changes the dynamics of the exercise, accentuating the range of motion and fostering a deeper activation of the glutes.
Targeted Muscles: While the primary focus remains on the gluteus maximus, elevating the heels during hip thrusts also places increased emphasis on the hamstrings and calf muscles. The altered position ensures a thorough contraction and stretch in these areas, complementing the glute workout.
Instructions:
- Begin by selecting a comfortable space on the floor. A yoga or exercise mat can provide cushioning for your back.
- Position yourself close to an elevation platform – this could be a set of weight plates, a low block, or any sturdy raised surface.
- Sit on the ground with your knees bent and feet flat. Place your heels on the elevated surface, ensuring they are shoulder-width apart. Your toes should be pointing upward.
- Lean backward, positioning your shoulder blades against a stable bench or similar platform.
- Place your arms to the side or on the bench for added stability.
- Engage your core, ensuring a neutral spine alignment.
- Push through your elevated heels, raising your hips towards the ceiling. The elevation will allow for a deeper stretch at the bottom and a higher thrust at the top.
- At the peak of the movement, focus on an intense contraction of the glutes.
- Control the descent, ensuring a steady return to the starting position without completely resting your hips on the ground.
- Repeat the movement for the desired number of repetitions.
Aim for 3 sets of 10-12 reps. As you become more accustomed to heels elevated hip thrusts, consider adding resistance (like a weight plate or resistance band) to further intensify the exercise and continue progressing in your glute development.
Shoulder & Feet Elevated Hip Thrusts
Optimal Range and Enhanced Intensity with Shoulder and Feet Elevated Hip Thrusts
Redefine the depth and challenge of your hip thrusts by elevating both your shoulders and feet. This dual-elevation not only extends the range of motion but also amplifies muscle engagement, ensuring a rigorous workout for the glutes and supporting muscle groups.
Targeted Muscles: The central emphasis is undeniably on the gluteus maximus. However, with both the shoulders and feet elevated, there’s added engagement in the hamstrings, quads, and core. The distinct positioning ensures a full contraction and dynamic stretch, promoting a well-rounded gluteal and lower body workout.
Instructions:
- Choose a comfortable spot, preferably with an exercise mat to support your back.
- Position two stable platforms or benches parallel to each other – one for your shoulders and another for your feet.
- Sit on the floor, placing your shoulder blades against one bench and both feet on the other. Ensure the benches are spaced so your knees form a 90-degree angle when hips are lowered.
- Your feet should be hip-width apart, and your arms can rest atop the shoulder bench or extend out to your sides for balance.
- Before initiating the movement, engage your core, maintaining a neutral alignment of the spine.
- Pushing through your feet, raise your hips skyward, striving for a straight line from your knees to your shoulders at the top of the movement.
- At this apex, emphasise a robust contraction in the glutes, holding the position momentarily.
- Gradually lower your hips, maximising the stretch at the bottom without resting completely on the ground.
- Continue this motion for the set number of repetitions.
Shoot for 3 sets of 10-12 reps. As you familiarise yourself with the shoulder and feet elevated hip thrusts, consider integrating additional resistance, such as a barbell or dumbbell, to continually challenge and foster growth in your glute and lower body muscles.
Intermediate Hip Thrust Variations with a Band
Leverage the dynamic tension of resistance bands to elevate your hip thrust exercises. These banded versions introduce consistent resistance, deepening muscle activation and bringing a rejuvenated challenge to a foundational exercise. Perfectly tailored for intermediate practitioners, these modifications are designed to boost strength and enhance muscle definition, promising impactful outcomes.
Banded Hip Thrusts
Enhanced Tension and Dynamic Resistance with Banded Hip Thrusts
Introduce the power of resistance bands into your hip thrust routine for a distinctive challenge. The continuous tension from the band intensifies the contraction and provides a unique resistance curve, ensuring that your glutes work hard throughout the entire range of motion.
Targeted Muscles: The primary target remains the gluteus maximus. However, the incorporation of a resistance band also stimulates the abductors and external rotators, ensuring a thorough gluteal engagement. Additionally, the band’s resistance amplifies activation in the hamstrings and core.
Resistance Band: Use a Mini Band (Hip Circle, Booty Band)
Instructions:
- Find a comfortable area, preferably with an exercise mat or padding to protect your back.
- Set up near a sturdy bench or platform for your shoulders.
- Position a looped resistance band just above your knees. Ensure the band is taut when your knees are hip-width apart.
- Sit on the ground, positioning your shoulder blades against the bench.
- Feet should be flat on the ground, roughly hip-width apart, ensuring the band remains tight.
- Place your hands on the bench or extend them to your sides for stability.
- Before starting the movement, engage your core and ensure your spine is neutrally aligned.
- Pressing through your heels, thrust your hips upwards. The band will provide added resistance, especially as you press your knees out against its tension.
- At the top of the motion, emphasise a strong contraction in the glutes and resist the band’s pull by keeping the knees apart.
- Control the return to the starting position, but don’t let the tension in the band slacken.
Aim for 3 sets of 10-12 reps. As you become adept at banded hip thrusts, consider experimenting with thicker or multiple bands to incrementally increase resistance and continue to challenge your glute muscles.
Banded Hip Thrust with Abduction
Enhanced Activation and Control with the Light Loop Band: Banded Hip Thrust with Abduction
Step up your hip thrust exercise by integrating a light loop band placed around your knees. This integration not only amplifies resistance but also emphasises control during the abduction, promoting intensified muscle activation and refined motor skills.
Targeted Muscles: The inclusion of the light loop band in this style primarily targets the gluteus maximus and gluteus medius. The resistance from the band, coupled with the abduction, fosters intensive engagement of the glutes. The inherent stability required in maintaining form throughout the movement also demands involvement from the core and hip flexors.
Instructions:
- Start by placing the light loop band around both legs, just above the knees.
- Position yourself for a traditional hip thrust: Sit on the ground with your back against a bench or elevated platform. Ensure your feet are flat on the floor, shoulder-width apart.
- As you begin to thrust your hips upward, press your knees outward against the resistance of the band. This outward movement is the abduction, which targets the gluteus medius.
- Ensure your foot placement is such that your knees form a 90-degree angle at the peak of the hip thrust.
- While pressing the knees out, focus on squeezing the glutes at the top of the movement for optimal activation.
- Slowly lower your hips back to the starting position while maintaining the tension in the band.
- Ensure you keep your core engaged throughout the exercise to protect the lower back and to enhance stability.
Aim for 3 sets of 12-15 repetitions, adjusting as needed depending on your familiarity with the exercise and the resistance level of the light loop band.
Feet-Elevated Banded Hip Thrust
Optimised Activation with Elevation: Feet-Elevated Banded Hip Thrust
Incorporate a dual-dimensional approach to your hip thrust exercise by combining the targeted resistance of a light loop band with the deepened range of motion that a feet-elevated position offers. The integration of these elements amplifies the challenge, ensuring a holistic engagement of the glutes and hamstrings.
Targeted Muscles: The feet-elevated banded hip thrust primarily targets the gluteus maximus, emphasising the hamstrings due to the elevation. The light loop band intensifies the resistance, demanding more from the glutes, while the core is engaged to stabilise the movement and shield the lower back.
Instructions:
- Begin by placing a light loop band around your thighs, just above the knees.
- Lie on the floor with your upper back and shoulder blades flat against the ground.
- Position your arms to the side for stability.
- Place your feet atop an elevated surface, such as a bench or step, hip-width apart, ensuring that the band remains taut.
- Pressing firmly through your heels, thrust your hips skyward. As you ascend, consciously press your knees outward against the resistance of the band.
- At the apex of the movement, your hips should reach their highest point with your glutes fully contracted.
- Slowly and with control, lower your hips back to the starting position, ensuring the band remains taut and your hips don’t completely rest on the ground between reps.
For an enhanced challenge, consider alternating between having your upper back on the floor and having it against an elevated platform, such as a bench.
Aim for 3 sets of 12-15 repetitions. Based on your comfort and the resistance level of the light loop band, adjust the number of sets and reps. As always, prioritizing controlled movement and consistent pacing will ensure maximum muscle engagement and best results.
Advanced Weighted Hip Thrust Variations
Elevate the rigor of your hip thrust workouts by incorporating weights. These weight-loaded variations signify a definitive progression, compelling your glutes to respond with heightened intensity. Tailored for advanced enthusiasts seeking formidable strength or a chiselled physique, these weighted modifications are set to catapult your fitness achievements to new heights.
Hip Thrust with Chain
Dynamic Resistance and Intensity: Hip Thrust with Chain
Level up your hip thrust routine by incorporating the unique and progressive resistance of chains. As you perform the movement, the lifting of chain links from the ground varies the resistance, making the exercise both dynamic and challenging.
Targeted Muscles: Primarily targeting the gluteus maximus, the hip thrust with chains also activates the hamstrings. As more chain links lift off the ground during the movement, the increasing weight demands even more from the glutes. The core is also engaged, providing stability throughout the exercise and ensuring spinal alignment.
Instructions:- Preparation: Lay out a mat or pad for comfort, and ensure you have a chain or multiple chains of suitable weight and length nearby.
- Positioning: Lie down with your upper back and shoulder blades against a bench or elevated platform. Your feet should be flat on the ground, placed shoulder-width apart.
- Chain Placement: Drape the chain(s) over your hips so that they are evenly distributed. The weight should be resting on your hips and not causing discomfort. Depending on the chain’s design, you might use a pad or cloth for added comfort.
- Stance and Grip: With your feet firmly planted and knees bent, grip the ends of the chains or the bench to ensure stability throughout the movement.
- Lifting: Drive through your heels, lifting your hips upward while feeling the increasing resistance as more chain links rise from the floor. Engage and squeeze your glutes at the top of the movement.
- Peak Position: At the topmost point, your body should form a straight line from your shoulders to your knees. The chains will add dynamic resistance, challenging you even at this peak position.
- Lowering: Slowly lower your hips back to the starting position. As you descend, the chain links will successively touch the ground, reducing the weight and offering a variable resistance experience.
Sets and Repetitions: Aim for 3 sets of 12-15 repetitions. Depending on your comfort with the chain’s weight and the progressive resistance it offers, you might need to adjust the sets and reps. Prioritising form and ensuring controlled movements, especially given the dynamic nature of the resistance, will be essential for optimal results and injury prevention.
B Stance Hip Thrusts
Maximise Glute Activation with B Stance Hip Thrusts
Take your glute development to the next level with the B stance hip thrust. By adjusting the positioning of your feet, this variant places a more concentrated load on one glute, ensuring a more targeted workout while still engaging both sides.
Targeted Muscles: The B stance hip thrust primarily focuses on the gluteus maximus of the working leg, though both glutes are activated. Secondary engagement is noted in the hamstrings, quadriceps, and core, offering a well-rounded lower body and core workout.
Instructions:
- Begin by sitting on the ground with your upper back against a stable bench, sofa, or ledge. Place both feet flat on the floor, hip-width apart.
- Adjust to a B stance by keeping one foot flat and closer to the glutes (this is the working leg) and placing only the toes of the other foot on the ground, a bit further out. This creates a staggered stance.
- Push through the heel of the working leg and raise your hips upward, squeezing the glutes at the top. The non-working leg (toes down) offers minimal assistance.
- Your body should form a straight line from your shoulders to the knee of the working leg at the peak of the movement.
Slowly lower your hips back to the ground, keeping the tension in the glutes without fully resting. - After completing the desired reps on one side, adjust to a B stance on the other leg and repeat.
Aim for 3 sets of 12 reps per side. Enhance the intensity by holding the elevated position for 5-10 seconds, focusing on the contraction in the working glute.
Dumbbell Hip Thrusts
Elevate Your Glute Workout with Dumbbell Hip Thrusts
Introduce a dynamic twist to your regular hip thrusts by incorporating a dumbbell. This addition not only amplifies the resistance, thereby intensifying muscle engagement, but also encourages better form and range of motion.
Targeted Muscles: While the primary emphasis remains on the gluteus maximus, the incorporation of the dumbbell demands added engagement from the hamstrings, core, and adductors, ensuring a comprehensive lower body workout.
Instructions:
- Begin seated on the ground, leaning your upper back against a secure bench, sofa, or ledge. Keep your feet planted flat on the floor, spaced at hip-width.
- Carefully position a dumbbell over your lap, right on the crease of your hips. Ensure it’s steady and secure. If needed, use a pad or folded towel for added comfort.
- Keeping your chin tucked and eyes looking forward, press through your heels, raising your hips off the ground. The weight of the dumbbell should be borne by the pelvis.
- Lift until your body aligns from shoulders to knees in a straight diagonal line, squeezing the glutes at the zenith of the movement.
- Slowly descend your hips back to the starting position, keeping the dumbbell stable and ensuring continuous muscle engagement without completely resting on the ground.
- Repeat for the desired number of repetitions.
Target 3 sets of 10-12 reps. To up the ante, consider pausing for a few seconds at the peak, ensuring a deeper glute contraction. Adjust the weight of the dumbbell as you progress, ensuring both challenge and safety.
Kettlebell Hip Thrust
Powerful Glute Engagement with Resistance: Kettlebell Hip Thrust
Experience a multi-dimensional hip thrust workout by integrating the weight of a kettlebell, offering an intensified challenge and deeper muscle engagement. The kettlebell brings an element of concentrated resistance, making the glutes work harder and ensuring a comprehensive workout.
Targeted Muscles: The Kettlebell Hip Thrust predominantly emphasises the gluteus maximus, with secondary activation of the hamstrings and core. The weight of the kettlebell enhances resistance, compelling the glutes to exert more effort. Simultaneously, the core is actively engaged to maintain stability and protect the lumbar spine during the movement.
Instructions:
- Positioning: Begin by sitting on the floor with your legs extended in front of you and a kettlebell close by.
- Preparation: Bend your knees and place your feet flat on the ground, hip-width apart. Position the kettlebell on your hips. For comfort, you can use a mat or soft padding under the kettlebell.
- Upper Body Placement: Lie down with your upper back and shoulder blades flat against the ground. Extend your arms out to the side for added stability.
- Lifting: Press through your heels and lift your hips towards the ceiling, ensuring you keep the kettlebell stable on your hips. As you lift, squeeze your glutes to engage them fully.
- Peak Position: At the top of the movement, your body should form a straight line from your shoulders to your knees, with the kettlebell securely in place. Ensure you’re not hyperextending your lower back; it’s the glutes doing the work.
- Lowering: Slowly lower your hips back down to the starting position without letting them completely touch the floor, ensuring continuous tension in the glutes.
For an advanced challenge and added stability work, consider doing single-leg kettlebell hip thrusts, lifting one foot off the ground while performing the thrust.
Sets and Repetitions: Aim for 3 sets of 12-15 repetitions. Depending on your strength and familiarity with the kettlebell’s weight, adjust the sets and reps. Remember, maintaining a controlled and steady pace throughout the exercise is pivotal for effective muscle engagement and minimising the risk of injury.
Landmine Hip Thrusts
Amplified Power and Precision with the Landmine Hip Thrust
Elevate your hip thrust routine by integrating the landmine setup. Utilising the barbell with the landmine attachment adds a unique resistance angle, which promotes deeper muscle engagement, refining the strength and sculpt of your glutes.
Targeted Muscles: Landmine hip thrusts predominantly target the gluteus maximus. This movement ensures an intensified contraction during the upward thrust. The angle and weight additionally engage stabilising muscles in the hips, core, and lower back, resulting in a holistic glute workout.
Instructions:
- Begin by selecting a suitable weight for your barbell. As with any exercise, it’s advisable to start with a manageable weight and progress as you acclimatise.
- Set up the barbell with the landmine attachment. Ensure it’s securely anchored.
- Sit on the ground with your feet flat, legs bent, and position the end of the barbell over your hips. You might want to use a pad or thick mat to protect your hip bones.
- Roll the barbell so it’s directly above your hips and lean back so your shoulder blades are resting against a bench or platform.
- Grip the barbell on both sides for stability. Ensure your feet are shoulder-width apart, and your chin is tucked to your chest.
- Engage your core and thrust your hips upward, driving through your heels. With the unique angle of the landmine, you’ll feel an intense squeeze in your glutes.
- At the apex of the thrust, ensure maximum glute engagement by squeezing them tightly.
- Control the descent, lowering your hips back to the starting position while maintaining tension in your glutes and core.
- Perform the desired number of reps before resting.
Target 3 sets of 10-12 reps. As you advance in strength and form, incrementally increase the weight on the barbell to consistently challenge and evolve your glute strength.
Smith Machine Hip Thrust
Concentrated Resistance and Control: Smith Machine Hip Thrust
Elevate your hip thrust routine by harnessing the precision and consistent resistance of the Smith Machine. This equipment provides a guided movement path, enabling more focused muscle engagement while also allowing for easy weight adjustments.
Targeted Muscles: The Smith Machine Hip Thrust puts a spotlight on the gluteus maximus. Given the controlled pathway of the machine, there’s an increased emphasis on the direct activation of the glutes. Secondary muscles involved include the hamstrings and the core. The linear movement of the Smith Machine ensures consistent resistance, pushing the muscles to work in a more targeted manner, while the core is recruited for stability and to ensure a neutral spine.
Instructions:
- Machine Setup: Begin by adjusting the Smith Machine bar to a height that allows you to slide underneath comfortably. Add the desired weight to the bar, ensuring it’s locked securely in place.
- Positioning: Lie on the floor with your upper back and shoulder blades against a bench or pad. Slide under the bar, positioning it across your hip crease. Ensure your feet are flat on the ground, placed shoulder-width apart.
- Grip and Stance: Hold the Smith Machine bar with both hands to stabilise it. Your knees should be bent at about a 90-degree angle when your hips are raised.
- Lifting: Unlock the bar and, with control, press through your heels, lifting your hips towards the ceiling. As you lift, squeeze your glutes to ensure maximum muscle engagement.
- Peak Position: At the top of the thrust, your body should create a straight line from your shoulders to your knees. Focus on contracting the glutes and keeping a neutral spine.
- Lowering: Gradually lower your hips, allowing the Smith Machine bar to descend along its track. Avoid resting completely at the bottom to maintain tension in the muscles.
Sets and Repetitions: Target 3 sets of 12-15 repetitions. Based on your strength and the weight loaded on the Smith Machine, you can adjust the number of sets and reps. As with any weighted exercise, emphasise form and controlled movement over heavy weight to maximise effectiveness and reduce the risk of injury.
Advantages of the Hip Thrust Exercise
Discover the sweeping benefits of the Hip Thrust, an esteemed exercise renowned for its potent influence on posterior power and form.
- Sculpted Glutes and Thighs: Regular execution of the Hip Thrust meticulously carves the glutes and thighs, moulding an enviable and different body shape with a more prominent and toned backside, complemented by formidable thighs.
- Optimal Glute Activation: This move directly zones in on the gluteus maximus, guaranteeing peak muscle engagement, fostering growth, and reinforcing the derrière.
- Enhanced Posterior Chain Strength: Engaging not just the glutes, but also the hamstrings and lower back, it amplifies the power and synergy across the body’s posterior.
- Solid Core Foundation: With a foundational emphasis on core stability, hip thrusts promote robust development of the abs and obliques, leading to a more defined midsection and shielding the spine from potential ailments.
- Refined Pelvic Mastery: It fortifies the muscles surrounding the pelvis, translating to heightened balance, finesse, and precision in diverse movements.
- Aware Spinal Alignment: Practicing the hip thrust accentuates the value of maintaining a neutral spine, fostering a regime of ideal posture.
- Amplified Daily Strength: Beyond aesthetics, the Hip Thrust augments functional power essential for everyday motions, diminishing the risk of frequent mishaps.
- Customisable Workout Variations: Its adaptive nature allows for tweaks using weights, resistance bands, or distinct postures, suiting a plethora of fitness goals and proficiency tiers.
- Engaging Often-Neglected Muscles: It keenly focuses on muscles typically sidelined in standard lower body regimens, ensuring a holistic leg and glute workout.
- Joint Vitality and Flexibility: Consistent performance bolsters the health of knee and hip joints, ensuring extended mobility and agility in these pivotal regions.
Integrating the Hip Thrust into your fitness toolkit not only guarantees a formidable and balanced lower body but also underscores the essence of total body unity and vigor.
Seeking inspiration for your next gym outfit?
Dive into these top three brands specialising in activewear and gym wear in Australia:


Navigating Common Pitfalls in Hip Thrust Execution
Embarking on the journey of mastering the Hip Thrust promises significant strength and toning rewards. Nevertheless, precision in its performance is crucial. Being mindful of frequent missteps not only amplifies the exercise’s efficacy but also reduces potential injury risks. Here’s a guide to some common oversights:
- Initial Positioning Errors: Your setup lays the foundation. Ensure your feet are flat and shoulder-width apart while the upper back rests securely on the bench. Proper alignment is the cornerstone of an effective thrust.
- Overextending the Back: Throughout the thrust, it’s vital to maintain a neutral spine. Overarching can compromise glute activation and put undue pressure on the lumbar spine.
- Neglecting Core Engagement: Remember, the core isn’t just for planks! Engage it continuously during the thrust. This provides stability, optimises glute engagement, and wards off unwanted back arching.
- Rushing Through the Motion: Quality over speed is the mantra for Hip Thrusts. Emphasise deliberate and controlled movements to fully activate the muscles and avoid undue strain.
- Excessive Hip Elevation: Aim for a controlled hip extension, stopping when aligned with your torso. Going beyond this point can risk hip or back discomfort and detract from glute focus.
- Half-hearted Repetitions: Complete each thrust by returning to the starting position. Short-changing the movement robs you of the exercise’s comprehensive advantages.
- Inconsistent Breathing: Keep a regular breath cycle. A general rule is to inhale during the descent and exhale as you thrust upwards.
By being attentive to these potential missteps, you’re well-positioned to reap the full rewards of the Hip Thrust, all while ensuring your body’s well-being.
Hip Thrust FAQ
Got questions about mastering the Hip Thrust? Browse our FAQ section for insights and tips to perfect your technique.
How to breathe during hip thrusts?
During hip thrusts, inhale as you lower your hips and exhale forcefully as you thrust them upwards, ensuring you engage your core throughout the movement.
Is hip thrust a compound exercise?
Yes, the hip thrust is a compound exercise, meaning it involves multiple joints and recruits several muscle groups simultaneously. While its primary focus is on the glutes, it also effectively engages the hamstrings, quads, and core. Additionally, the hip thrust requires stability and activation from the lower back and adductors, making it a comprehensive lower body movement that offers a holistic strength and muscle-building stimulus.
Are hip thrusts good for athletes?
Absolutely, hip thrusts are highly beneficial for athletes. This exercise specifically targets the glutes, which play a pivotal role in many athletic movements such as sprinting, jumping, and changing direction. Strengthening the glutes can lead to improved performance, increased power output, and a reduced risk of injuries. Incorporating hip thrusts into an athlete’s training regimen can enhance their explosive capabilities and contribute to a more stable and efficient kinetic chain, which is essential for optimal athletic performance.
How to stop feeling hip thrusts in quads?
If you’re predominantly feeling hip thrusts in your quads, consider the following adjustments to shift the emphasis back to the glutes:
- Foot Placement: Ensure your feet are positioned correctly. If they’re too close to your glutes, it can put more strain on your quads. Move your feet slightly further away from your body, while ensuring that at the top of the movement, your shins are vertical.
- Drive Through Heels: Actively think about pushing through your heels rather than the balls of your feet. This can help recruit the glutes more effectively.
- Mind-Muscle Connection: Before initiating the movement, contract your glutes. Maintaining a strong mind-muscle connection ensures that the glutes are engaged throughout the exercise.
- Posterior Pelvic Tilt: As you thrust upwards, think about tucking your pelvis under slightly (posterior pelvic tilt). This can help reduce quad dominance and prioritize glute engagement.
- Warm-Up: Before performing hip thrusts, activate your glutes with exercises like clamshells, glute bridges, or banded lateral walks. This “wakes up” the glutes and prepares them to be the primary movers during the thrust.
- Evaluate Hip Mobility: Tight hip flexors can hinder glute activation. Incorporate stretches and mobility exercises targeting the hip flexors to alleviate this issue.
- Form Check: Occasionally, a subtle form mistake can lead to quad dominance. Consider seeking feedback from a fitness professional or recording yourself to ensure your technique is on point.
Making these adjustments can help refocus the hip thrust’s impact on the glutes rather than the quads.
Why do hip thrusts hurt my pelvis?
If hip thrusts are causing discomfort in your pelvis, several factors could be at play:
- Bench Edge Pressure: One common reason for pelvic pain during hip thrusts is the pressure from the edge of the bench against the pelvis. Using a padded barbell pad or folded mat can help distribute the weight and alleviate direct pressure.
- Form and Technique: Incorrect technique can lead to unnecessary strain on the pelvis. Ensure that you maintain a neutral spine throughout the movement, avoid overextending at the top, and engage your core to protect the pelvic region.
- Bar Placement: The barbell should be placed over the hip crease, not directly on the bones of the pelvis. If it’s too high or too low, it can cause discomfort.
- Foot Position: If your feet are placed too far away from your body, it may cause an anterior pelvic tilt, leading to discomfort. Ensure your feet are positioned so that your shins are vertical at the top of the movement.
- Pelvic Imbalances: Underlying musculoskeletal imbalances or weaknesses, such as an anterior pelvic tilt or weak core muscles, can exacerbate discomfort during hip thrusts.
- Tight or Imbalanced Muscles: Tight hip flexors or an imbalance between the muscles of the posterior chain and the anterior chain can affect the pelvis during the movement.
- Existing Injuries or Conditions: If you have a history of pelvic injuries, inflammation, or conditions like pelvic girdle pain, hip thrusts might exacerbate those issues.
It’s essential to address any pain immediately. Consider consulting with a physical therapist or certified personal trainer who can assess your form and offer personalized guidance. If the pain persists or is severe, seeking medical advice is recommended.
Are hip thrusts safe during pregnancy?
Hip thrusts can be safe during pregnancy for many women, but there are some considerations and modifications to keep in mind:
- Consult a Healthcare Professional: Before incorporating or continuing any exercise during pregnancy, it’s vital to consult with your obstetrician or a healthcare professional to ensure it’s safe for both you and the baby.
- Modify as Needed: As the pregnancy progresses, the traditional setup for hip thrusts may become uncomfortable due to the growing belly. Consider using an incline bench or performing them with your back on the floor (like a glute bridge) for more comfort.
- Monitor Intensity: It’s essential to listen to your body. If you feel any discomfort, pain, or strain, stop the exercise. Also, avoid maximal lifts or overly heavy weights; instead, focus on moderate resistance and maintain a rep range that feels comfortable.
- Mind Core Engagement: Proper core engagement can help protect the spine and pelvis. However, avoid creating too much intra-abdominal pressure, which can exacerbate diastasis recti (separation of abdominal muscles).
- Breathing: It’s crucial to breathe properly. Avoid holding your breath, as this can increase blood pressure and intra-abdominal pressure.
- Positional Awareness: Later in pregnancy, lying flat on your back for extended periods can put pressure on the vena cava, a significant vein that returns blood to the heart. This can potentially reduce blood flow to the fetus. If you feel dizzy, nauseous, or short of breath, change your position.
- Balance and Stability: As pregnancy progresses, changes in weight distribution can affect balance. Ensure you have proper stability, especially when getting into and out of the hip thrust position.
Remember, each pregnancy is unique. What might be safe and comfortable for one individual might not be for another. Always prioritize your well-being and that of your baby by staying attuned to how exercises feel and seeking guidance from healthcare professionals when in doubt.
Are barbell hip thrusts safe during pregnancy?
Barbell hip thrusts during pregnancy may not be ideal due to the barbell pressing against the growing belly, which could be uncomfortable or potentially restrictive. While some women might manage with lighter weights or padding, there are safer and more comfortable variations, such as bodyweight or band-assisted hip thrusts. Always consult with your obstetrician or a healthcare professional and prioritize the safety of both mother and baby.
Are hip thrusts bad for your uterus?
In general, hip thrusts are not inherently bad for the uterus. However, improper technique or excessive weight can cause discomfort or strain in the pelvic region. It’s essential to use correct form, appropriate weight, and consult a healthcare professional if concerns arise.
Can hip thrusts make you infertile?
No, hip thrusts, when performed correctly, do not cause infertility. Exercise-related impacts on fertility are typically linked to extreme physical activities combined with other factors. If there are concerns about fertility, it’s essential to consult a healthcare professional.
Best Hip Thrust Alternatives
Discover alternative exercises that target the same muscle groups, offering innovative ways to strengthen and sculpt your glutes and hips beyond the traditional hip thrust technique.

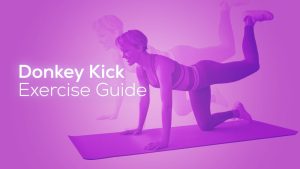
Donkey Kick Exercise
For the donkey kick, start on all fours, then lift one leg towards the ceiling while keeping the knee bent, honing in on and strengthening the gluteal muscles.
➜ Learn more about the Donkey Kick Exercise

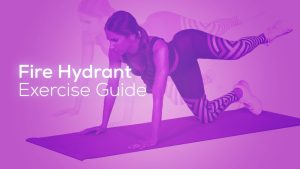
Fire Hydrant Exercise
The Fire Hydrant exercise, executed on all fours, is crafted to stimulate and fortify the hip and glute muscles through lateral leg lifts.
➜ Learn more about the Fire Hydrant Exercise